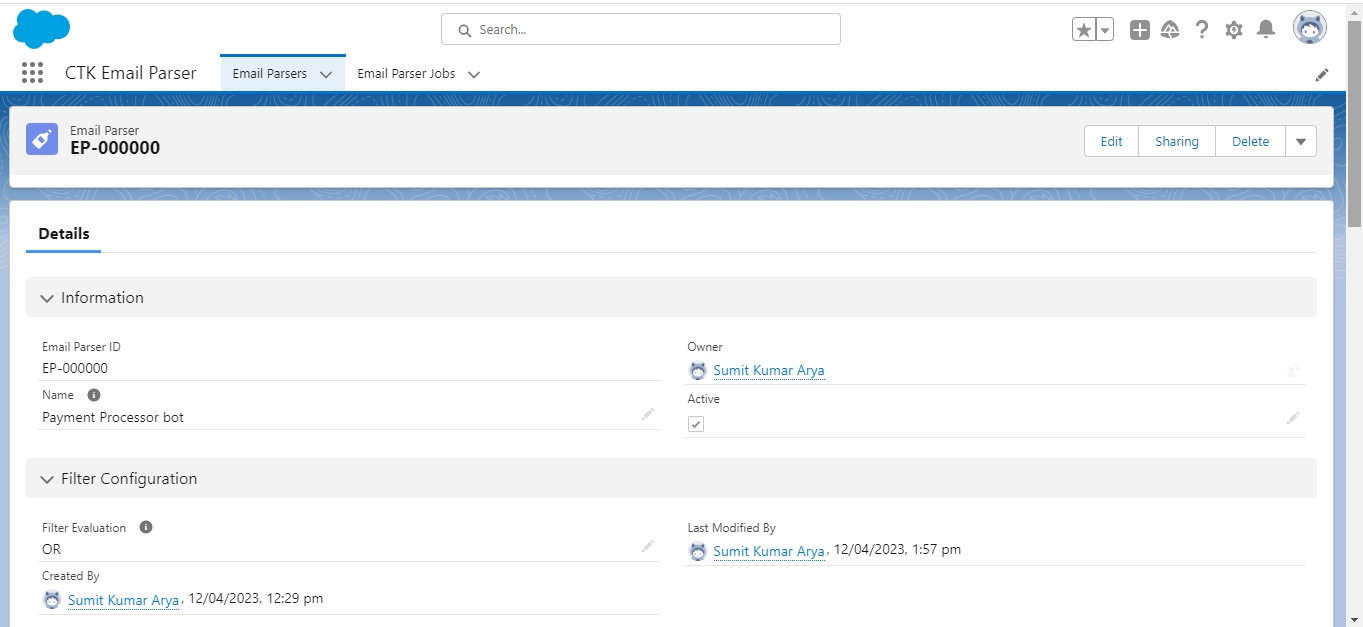
We can create a new ‘Email Parser’ by clicking on the ‘New‘ button.
- Enter a ‘Reference Name’ for the parser and click on the ‘Active‘ checkbox.
- Select the ‘Filter Evaluation’ value and click on ‘Save‘ to generate a unique Email Parser ID.
Email Filter:
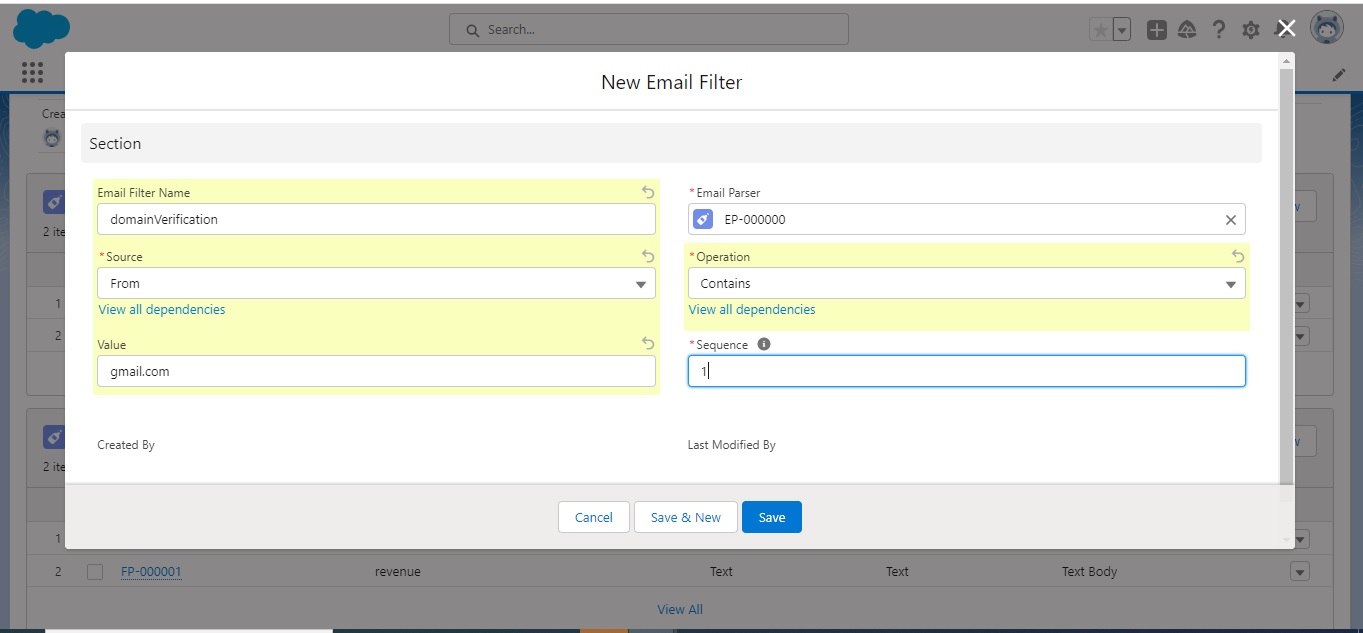
- Move on to the Email Filters section and click on ‘New‘.
- Enter the name of the Email Filter and select a single value from the ‘Source‘ drop-down field.
- Select an ‘Operation‘ from its drop-down and put any related name in the ‘Value‘ field then fill unique ‘Sequence’ number and finally, click on ‘Save‘.
Field Parser:
Let’s move on to the Field Parsers section.
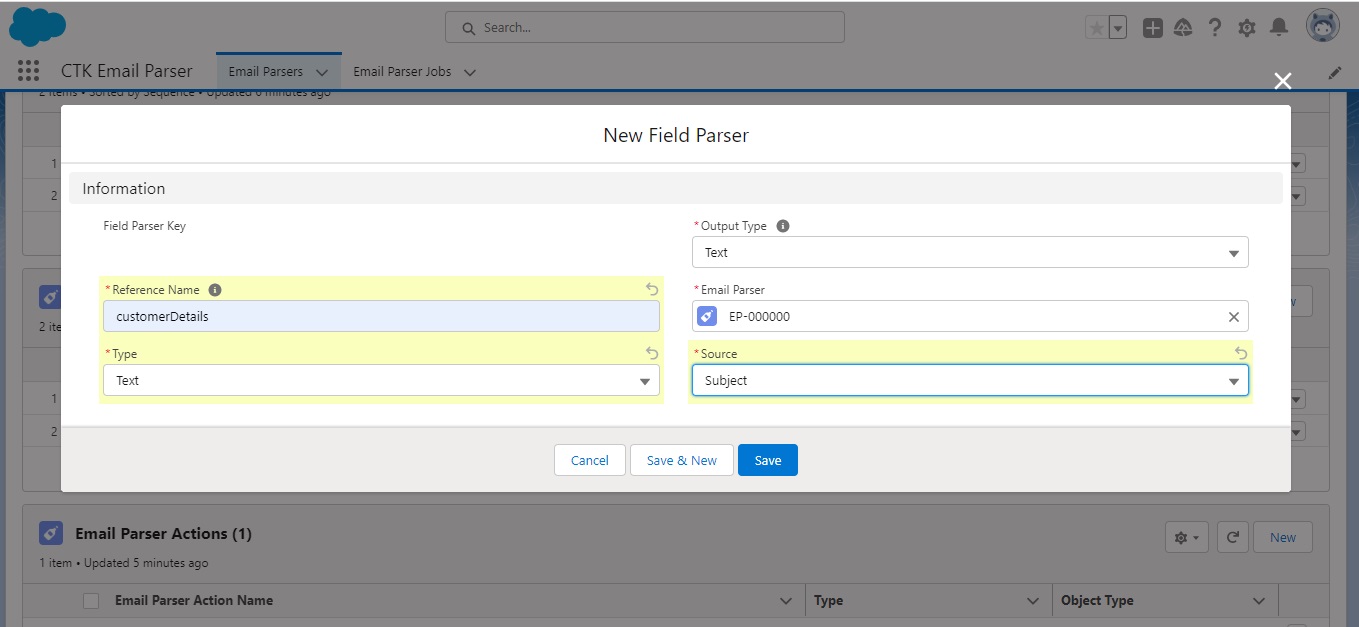
- Click on ‘New‘ to create a new Field Parser.
- Enter the ‘Reference Name’ and select a single value from the ‘Type‘ drop-down field like ‘Text”.
- Select a ‘Subject‘ from Source drop-down and click on ‘Save‘.
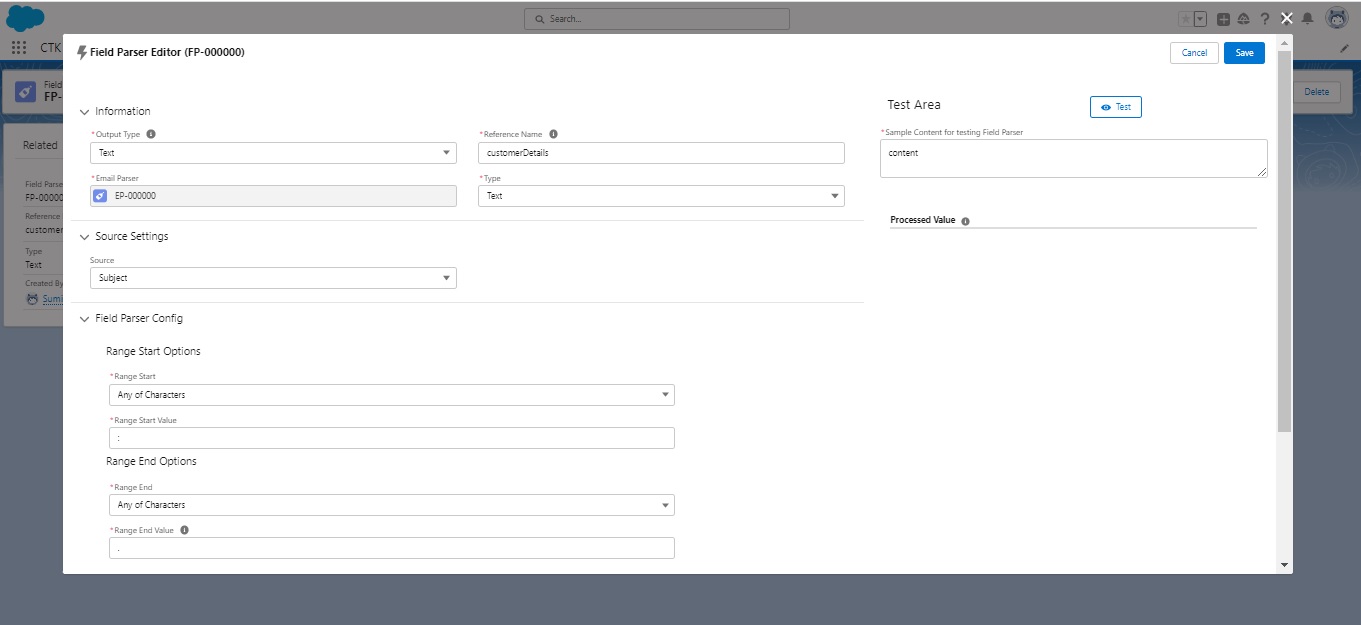
- Click on the created Field Parser to open the record layout.
- Click on the ‘Build’ button on the top right corner.
- Select ‘Text’ in the Output field then write ‘CustomerDetails’ in the ‘Reference Name’ field afterwards select ‘Text’ as a Type and select ‘Subject’ in the Source field.
- In field Parser Config section select ‘Any of Characters’ in the ‘Range Start’ and put ‘:’ in it.
- Then section select ‘Any of Characters’ in the ‘Range End’ and put ‘.’ In it.
- Write a sample text in the Text Area and start selecting the filter criteria from Range start to Range Ends.
- Click on ‘Test‘ to check the functionality.
- Choose the correct option from the ‘Multiple Results Configurations‘ and click on ‘Save‘.
Action (attach to record)
Actions:
Let’s move on to the Email Parser Actions section.
- Click on ‘New‘ to create a new Email Parser Action.
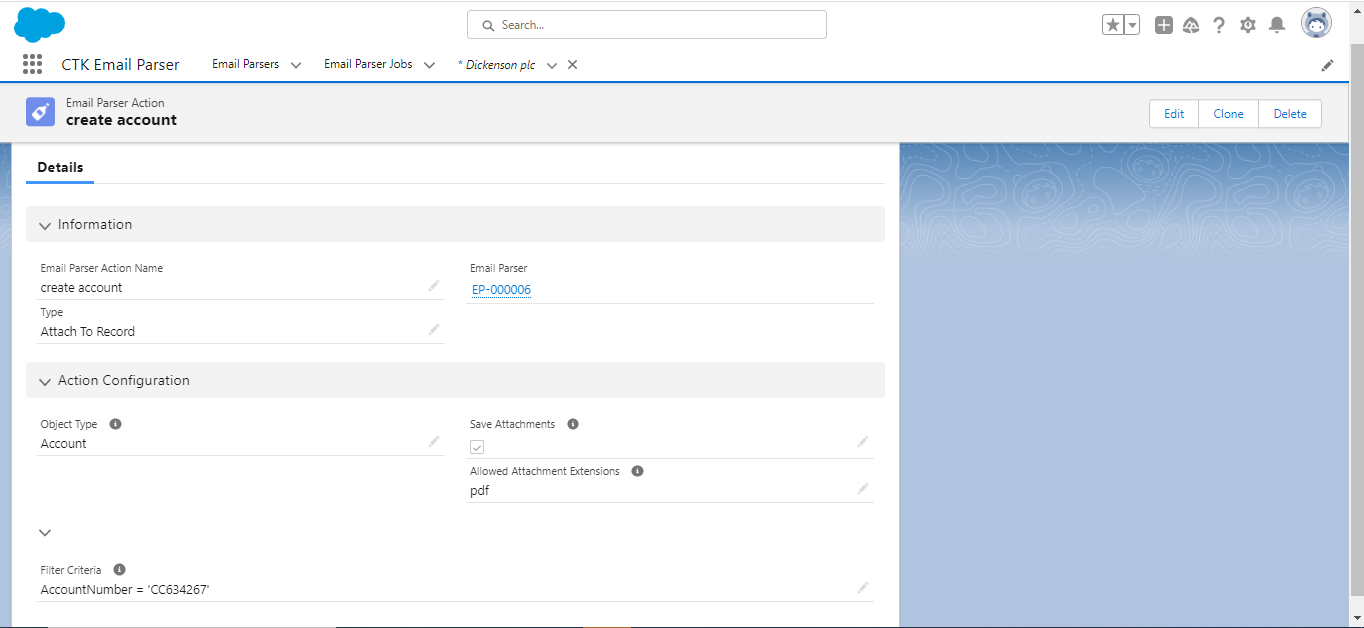
- Enter the name as ‘Create Account’ and select ‘Attach To Record’ in the ‘Type’ section.
- Afterwards Fill ‘Account’ in the ‘Object Type’ field and click on ‘Save Attachment’ checkbox.
- Then, fill ‘pdf’ in Allowed Attachment Extensions.
- Afterwards fill the ‘Filter Criteria’ with field API Name and its value. Finally click on ‘Save’ button.
