Email Parser:
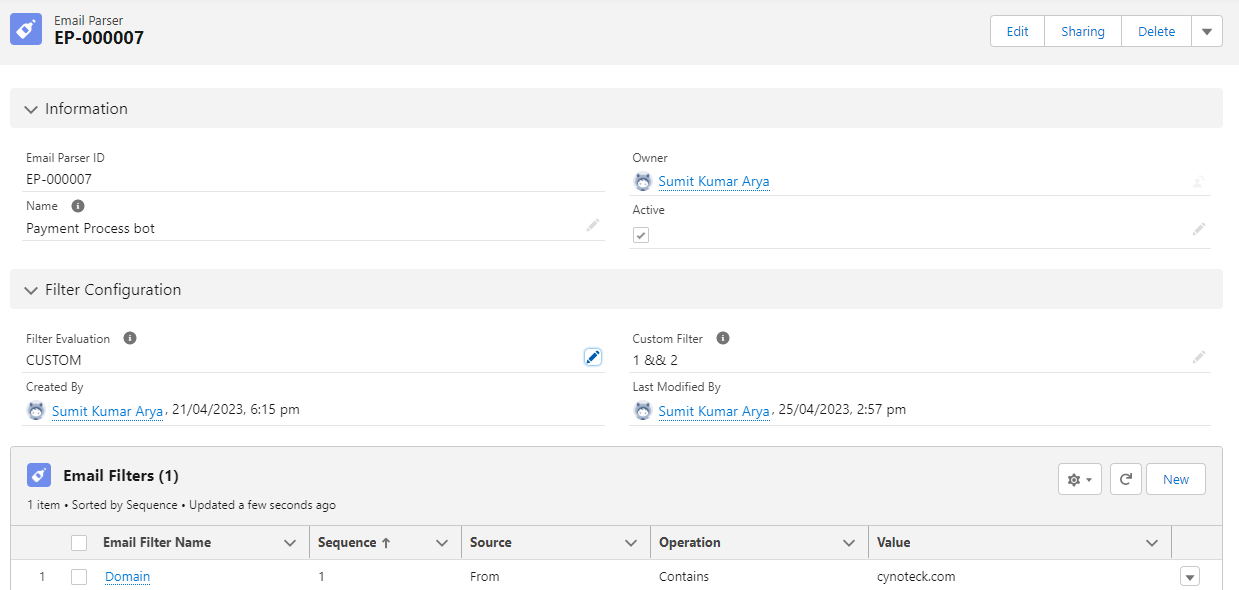
- Create a new Email Parser by clicking on the ‘New‘ button. Enter a ‘Reference Name’ for the parser and click on the ‘Active‘ checkbox.
- Select the Filter Evaluation value as ‘Custom’ and set ‘Custom Filter’ as “1 && 2 “.
- Click on ‘Save‘ to generate a unique Email Parser ID.
NOTE: This specifies custom filter evaluation criteria for complex scenario. Use Filter’s sequence number within criteria Ex:
(1 && (2 || 3) && 4)
Email Filter:
- In the Email Filters section and click on ‘New‘.
- Enter the name of the Email Filter and select a single value from the ‘Source‘ drop-down field.
- Select an ‘Operation‘ from its drop-down and put any related name in the ‘Value‘ field.
- Finally, click on ‘Save & New‘ button.
Repeat the above Email Filter steps to make another Filter for second value for CUSTOM filter.
Active / Deactivate an email parser.
Whenever user creates any ‘Active’ Email Parser that parser will be successfully extract the data from an incoming email as with the ‘Active’ email parser user can get the exact logs in the Email parser jobs. If user will ‘deactivate’ the email parser that parser will not create any logs regarding the execution.
Steps to perform:
- Open an active email parser and try to edit any Email parser field or underlying configuration records (Field Parser, Email Filter, Email Parser Action).
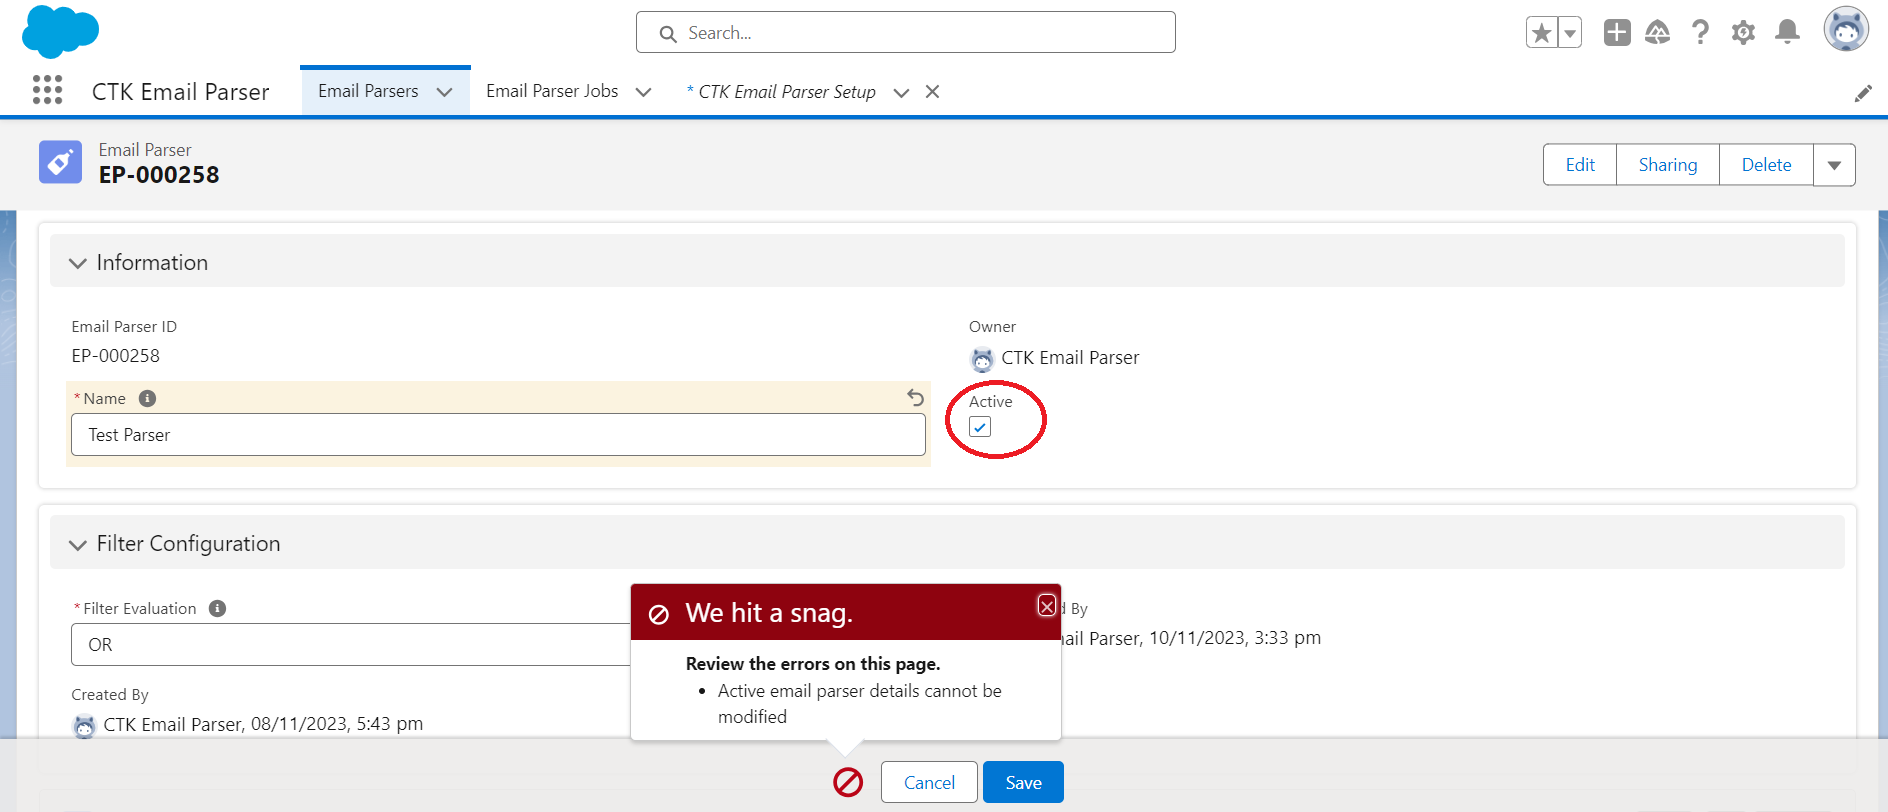
Restrict Any Edits Active Email Parsers
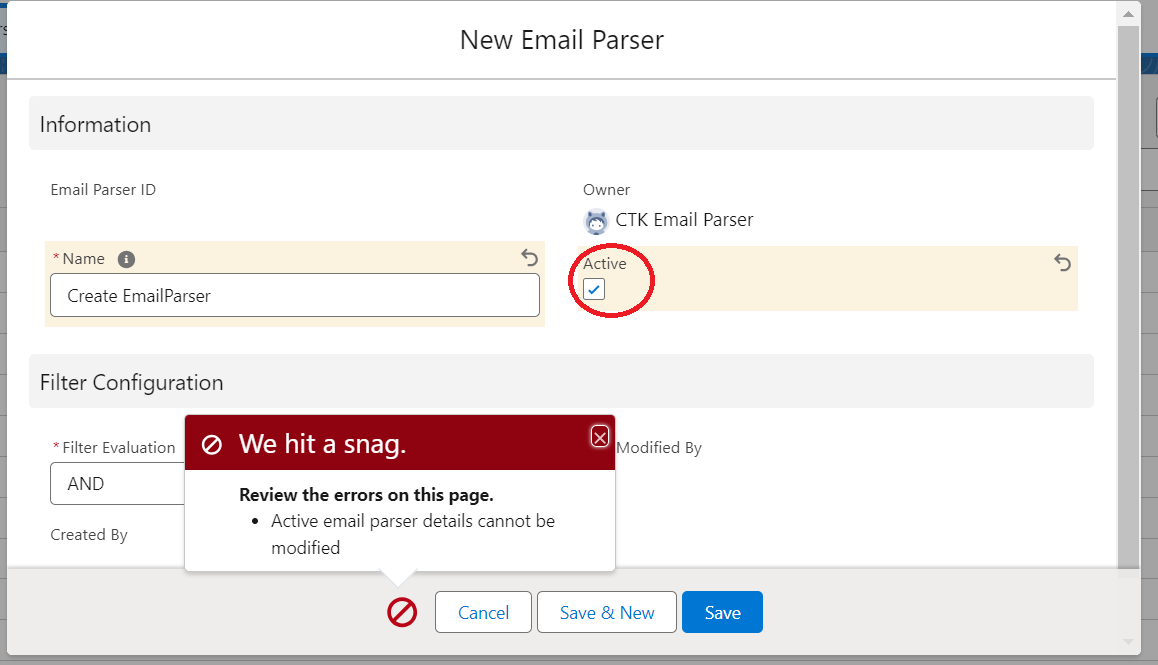
For security purposes, users will now be restricted to make any changes to live (Active is checked) Email Parser or underlying configurations. Also, users cannot make email parser Active while creating new Email Parser, to avoid considering email parser for processing incoming emails, until ready.
NOTE: To modify Email Parser and related records, users must deactivate email parser first.
Clone Email Parser
- Click on any existing record then click on drop-down in the top right side where user will get the ‘Clone’ button.
- Afterwards Edit the name of existing record in ‘Clone Parser Name’ field.
- Then Click on ‘Next’ button and finally click on ‘Finish’ button.