1. Install CTK Email Parser package from the Salesforce AppExchange,
Open below mentioned link to visit CTK Email parser listing page. Follow through general steps to install app on your desired Salesforce org.
CTK Email Parser – AppExchange Listing
2. Create an Email Service:
- Go to Setup (After the package installation user move towards the “set up” option which is in the Gear icon).
- In search (within setup) textbox, enter Email Service
- Click on Email Services within setup items filtered list.
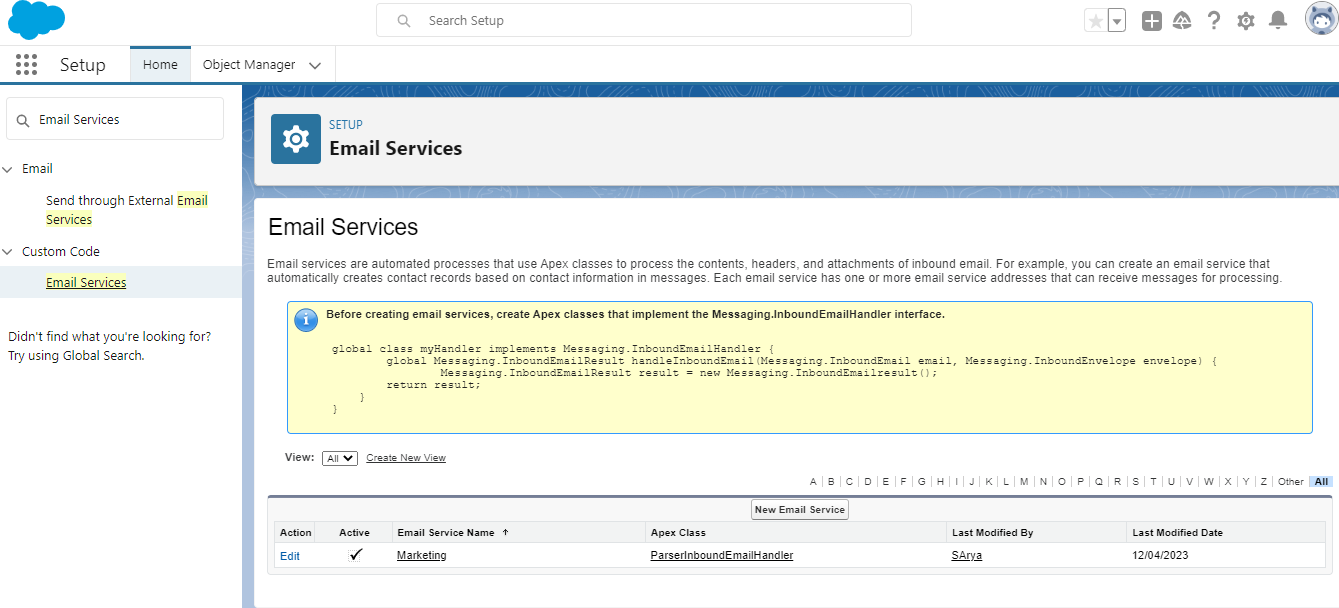
- Click on New Email Service button.
- Enter name as desired (for example, Automated email bot)
- Click on lookup button next to Apex Class and select class named ParserInboundEmailHandler.
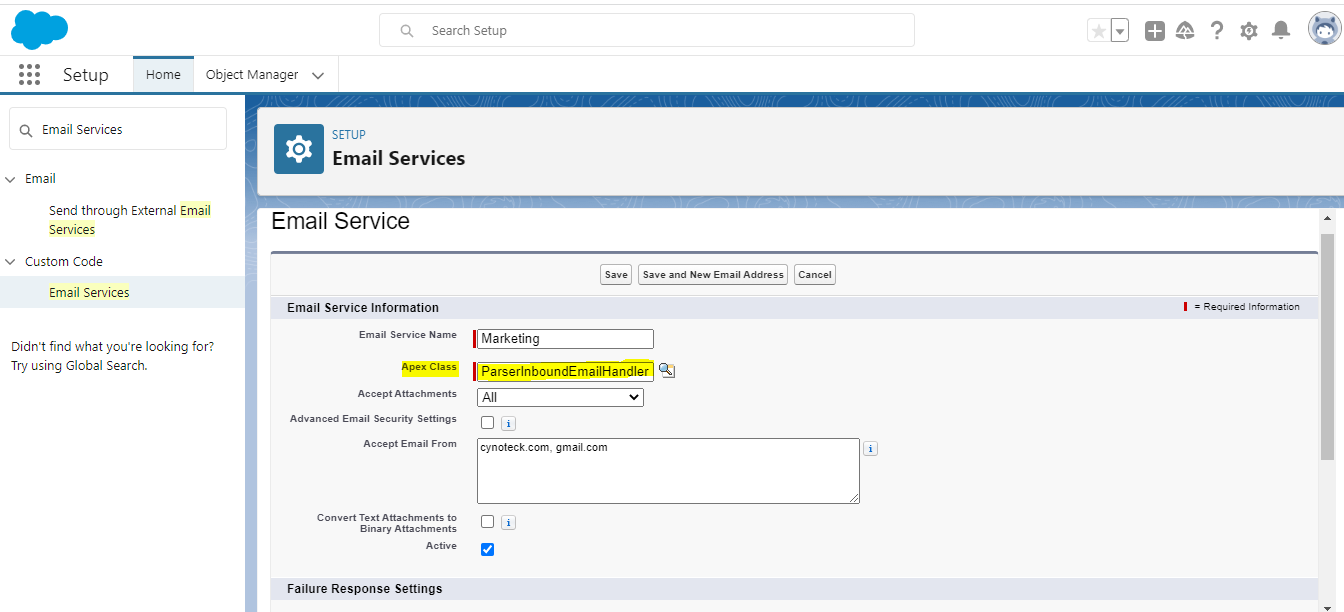
- Ensure Active checkbox is checked.
- Click Save
Note: On completion of this step salesforce automatically generates a unique email address, to be used for sending emails to salesforce.
3. Create Email Service Address
- Within the Email Service record created in previous step, click on New Email Address button within Email Addresses related list.
- Enter desired name (for example, Sales)
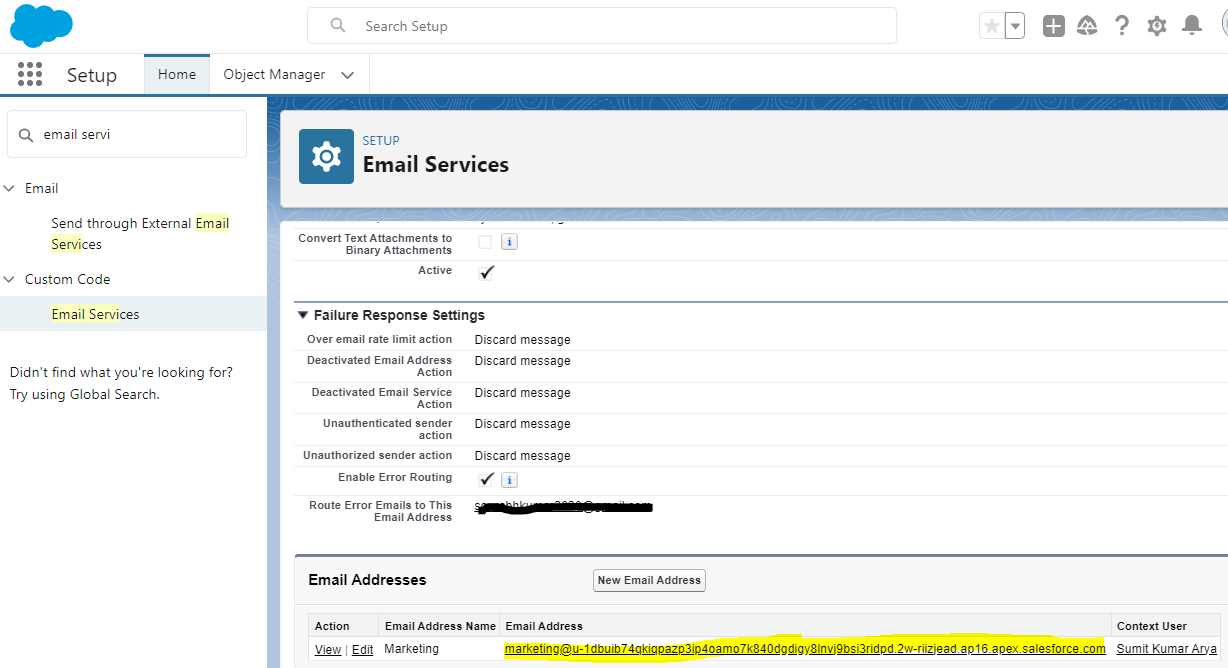
- Ensure Active checkbox is checked.
4. Assign permissions to Users
Assign permission set CTK Email Parser Admin is assigned to required users (who will manage email parsers within CTK Email parser).
Salesforce help: Assign Permission Set to Users
5. Setup Email Forwarding
Setup forwarding rule in external facing mailbox (within Email Service, provide domain in ‘Accept Email From’ to get emails from respected domain names. For example, cynoteck.com, gmail.com etc.). Ensure required business emails are forwarded/redirected to the email service address generated in previous step (Created within step named Create Email Service address).
Instructions to setup email forwarding with Microsoft-Exchange
Instructions to setup email forwarding with Gmail
Additional Security Settings
Salesforce provides additional security configurations within Email Service settings, that can be utilized as needed. For more information, please refer to Salesforce documentation for Email Service settings.